微軟 micro:bit 創意課程系列--Milk monster
2017-10-09 13:01微軟 micro:bit 創意課程系列--Milk monster

Make a funny milky-monster robot! 做一個有趣的乳狀怪物機器人!

持續時間
3活動,約30-45分鐘,每個基於熟悉編碼概念
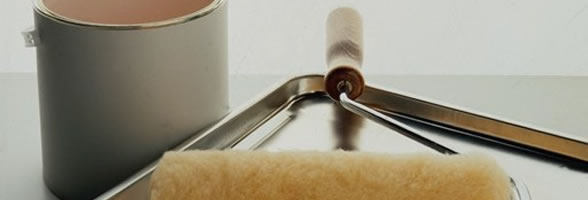
物料
回收
•1個牛奶紙箱(帶可旋轉的頂蓋)
•1個小號線 - 從用過的茶包中回收的繩子
•1張紙夾
電子產品
•1微:位,電池座和2節AAA電池
•3個鱷魚夾
•1微伺服9g SG90
•1個伺服夾設計用於在thingiverse上的Milky Monster下載(可選)。 教師可能更喜歡下載教室包(16個伺服夾)。
工具
•可剪切紙板的小刀和剪刀
•膠帶(掩模,膠帶和/或包裝膠帶)
• 膠槍

Preparation
- Equip the microservo with crocodile clips
- Get the cut-out template
- Download and 3D-print servo clip designed for MIlky Monster from thingiverse (this is optional). Teachers may prefer to download the classroom pack (16 servo clips).
Activities
about the author
This project was contributed by Peter Heldens @peterheldens. You can checkout his micro:bit makershow channel on youtube for more projects.
Make
把一塊紙板變成一個乳白色的怪物!

Step 1: download and cut the template
Download the template and cutout the template.

Step 2: glue template on milk carton
Glue the template on the milk carton.

Step 3: cut carton
Cut the carton (watch the fingers!)

Step 4: create mouth
Cut the cardboard halfways and fold the corners. This will be the mouth of the Milky Monster.

Step 5: extend mouth
Use tape to extend the mouth approx 1 cm. Fold one after the other.

Step 6: connect cord
Using scissors, create a small whole to insert the cord. Tape the cord on the backsite of the mouth.

Once finished position the mouth in upward position and fix the cord between the cap.

Step 7: create space for micro:bit
Use scissors to create space at the bottom of the Milky Monster to attach the micro:bit.

Step 8: Create space for cables
Create space to route the cables nicely on back of the milky-monster.

Step 9: attaching clip to servo
Use a philips screw driver to mount the servo to the 3D-printed servo clip. If you don’t have the 3D-printed clips available, download on thingiverse , or fix the servo using tyraps or a glue gun.

Step 10: attaching servo to milk button
Glue servo to the cap of the milk carton.

Step 11: cutout hole in cap
Cutout a hole in the cap to guide the string to the servo.

Step 12: connect crocodile clips
Connect the crocodile clips to the servo.

It’s ready!
Your milky-monster is ready, it is time to decorate it! Customize the milky monster to your taste!

NEXT: Code Edit this page on GitHub
Code
Add code to make the Milky Monster move.
Duration: ~30 minutes
Step 1: calibrate servo
步驟1:校準伺服
為了讓銀河怪物移動,micro:bit需要以一定的速度命令伺服器在0到180度之間。 在下面的代碼中:
•用戶按下按鈕A將伺服器切換到180度(關閉Milky Monster口)。
•用戶按下按鈕B將伺服器切換到0度(打開Milky Monster口)。
Step 2: attach rotor
步驟2:安裝轉子
在將轉子安裝到其上之前,伺服應位於180度。 這是為了確保一旦伺服器達到180度,就會關閉“銀河怪獸”的口腔。
您可以使用飛利浦scew驅動器將轉子連接到伺服。

Step 3: check calibration
步驟3:檢查校準
當用戶按下A時,伺服轉子應處於“向上”位置。

Step 4: connect cord to rotor
步驟4:將電線連接到轉子
將Milky Monster的嘴巴關閉時,將電源線連接到伺服電機上

Step 5: connect cables to micro:bit
步驟5:將電纜連接到micro:bit
將電纜從micro:bit連接到伺服器並放置電池。

Step 6: code light sensor
步驟6:代碼光傳感器
對微位置上的光傳感器進行編碼,以控制伺服。

Step 6: Ready!
Your Milky Monster is ready!

Connect
Remote control your Milky Monster with another micro:bit
Duration: ~30 minutes
遙控你的銀河怪物與另一個micro:bit
時間:〜30分鐘
您將需要2微:這部分。 通過使用收音機,我們可以使得由另一個微處理器控制的銀河怪物:位。 將下面的代碼下載到Milky Monster的micro:bit和另一個“controller”micro:bit。 當A被壓制時,Milky Monster會移動一次

Microbit 中文 課程 : Python , Javascript, 物聯網
標籤:
—————